
Open the airport editor
Pair the editor with your simulator
Section titled “Pair the editor with your simulator”Contribution mode pairs a browser editor with your running sim (figure below). Edits show live in the sim, so you align against the real 3D world.
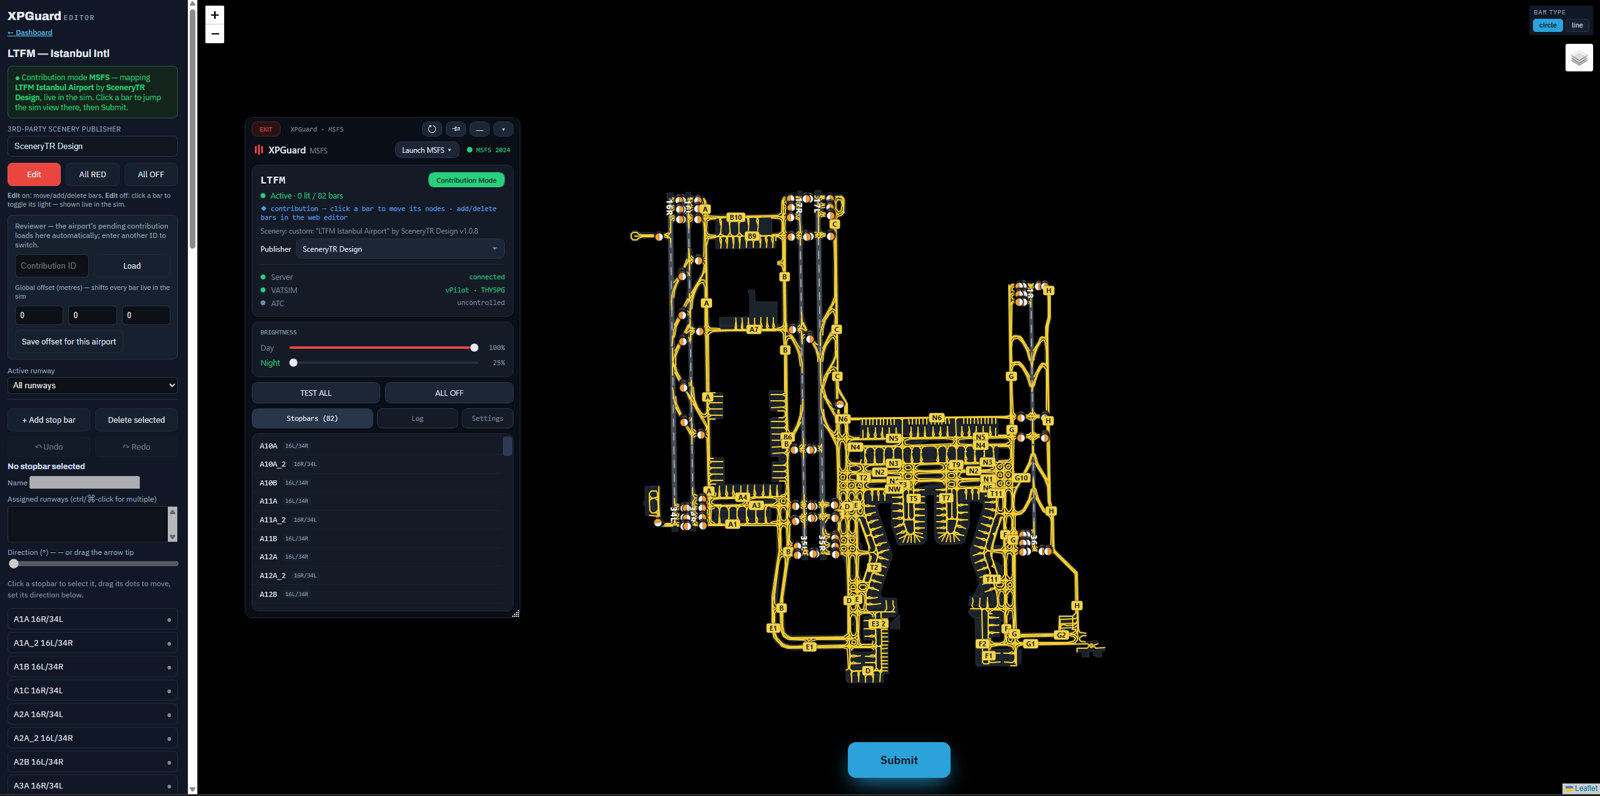
- Works in X-Plane and MSFS.
- The only way to map an add-on.
Start it from the pilot plugin:
- X-Plane - click
Stop bar + RELunder Contribution mode. - MSFS -
Contribution Mode ▾→BAR · LEAD-ON · REL.
MSFS only
- A warning that contribution mode moves your aircraft - click
OK. - A
Which scenery?dialog - only when it is genuinely ambiguous: several add-ons cover the airport, or the loaded one is not the Publisher picked in the app. Pick the add-on you are mapping and clickContinue. One matching add-on is chosen for you without asking. The built-in airport needs no pick either - it is mapped asMSFS · Stock, on 2020 and 2024 alike.
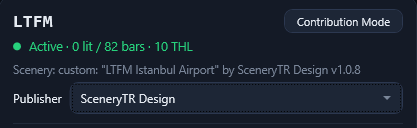
The plugin then opens the editor in your browser. It tells the editor whether you are on the built-in airport or an add-on, so your map is filed correctly.
Then, in the editor:
-
Every change mirrors into the sim within a second or two.
All ON/All OFFflash the lights, so you can confirm the bars sit right. -
Jump to a bar - it works both ways:
- Click a bar in the editor → the sim goes to it. X-Plane flies the camera. MSFS teleports you ~15 m in front, facing it.
- Click a bar in the app’s Stopbars list → the editor map zooms to it.
Either way, that bar becomes the one the keyboard nudges.
-
Click
Submitwhen done. Contribution mode ends and the plugin returns to the live map.
Nudging a bar’s shape from the sim
Section titled “Nudging a bar’s shape from the sim”You never have to leave the 3D view to line a bar up.
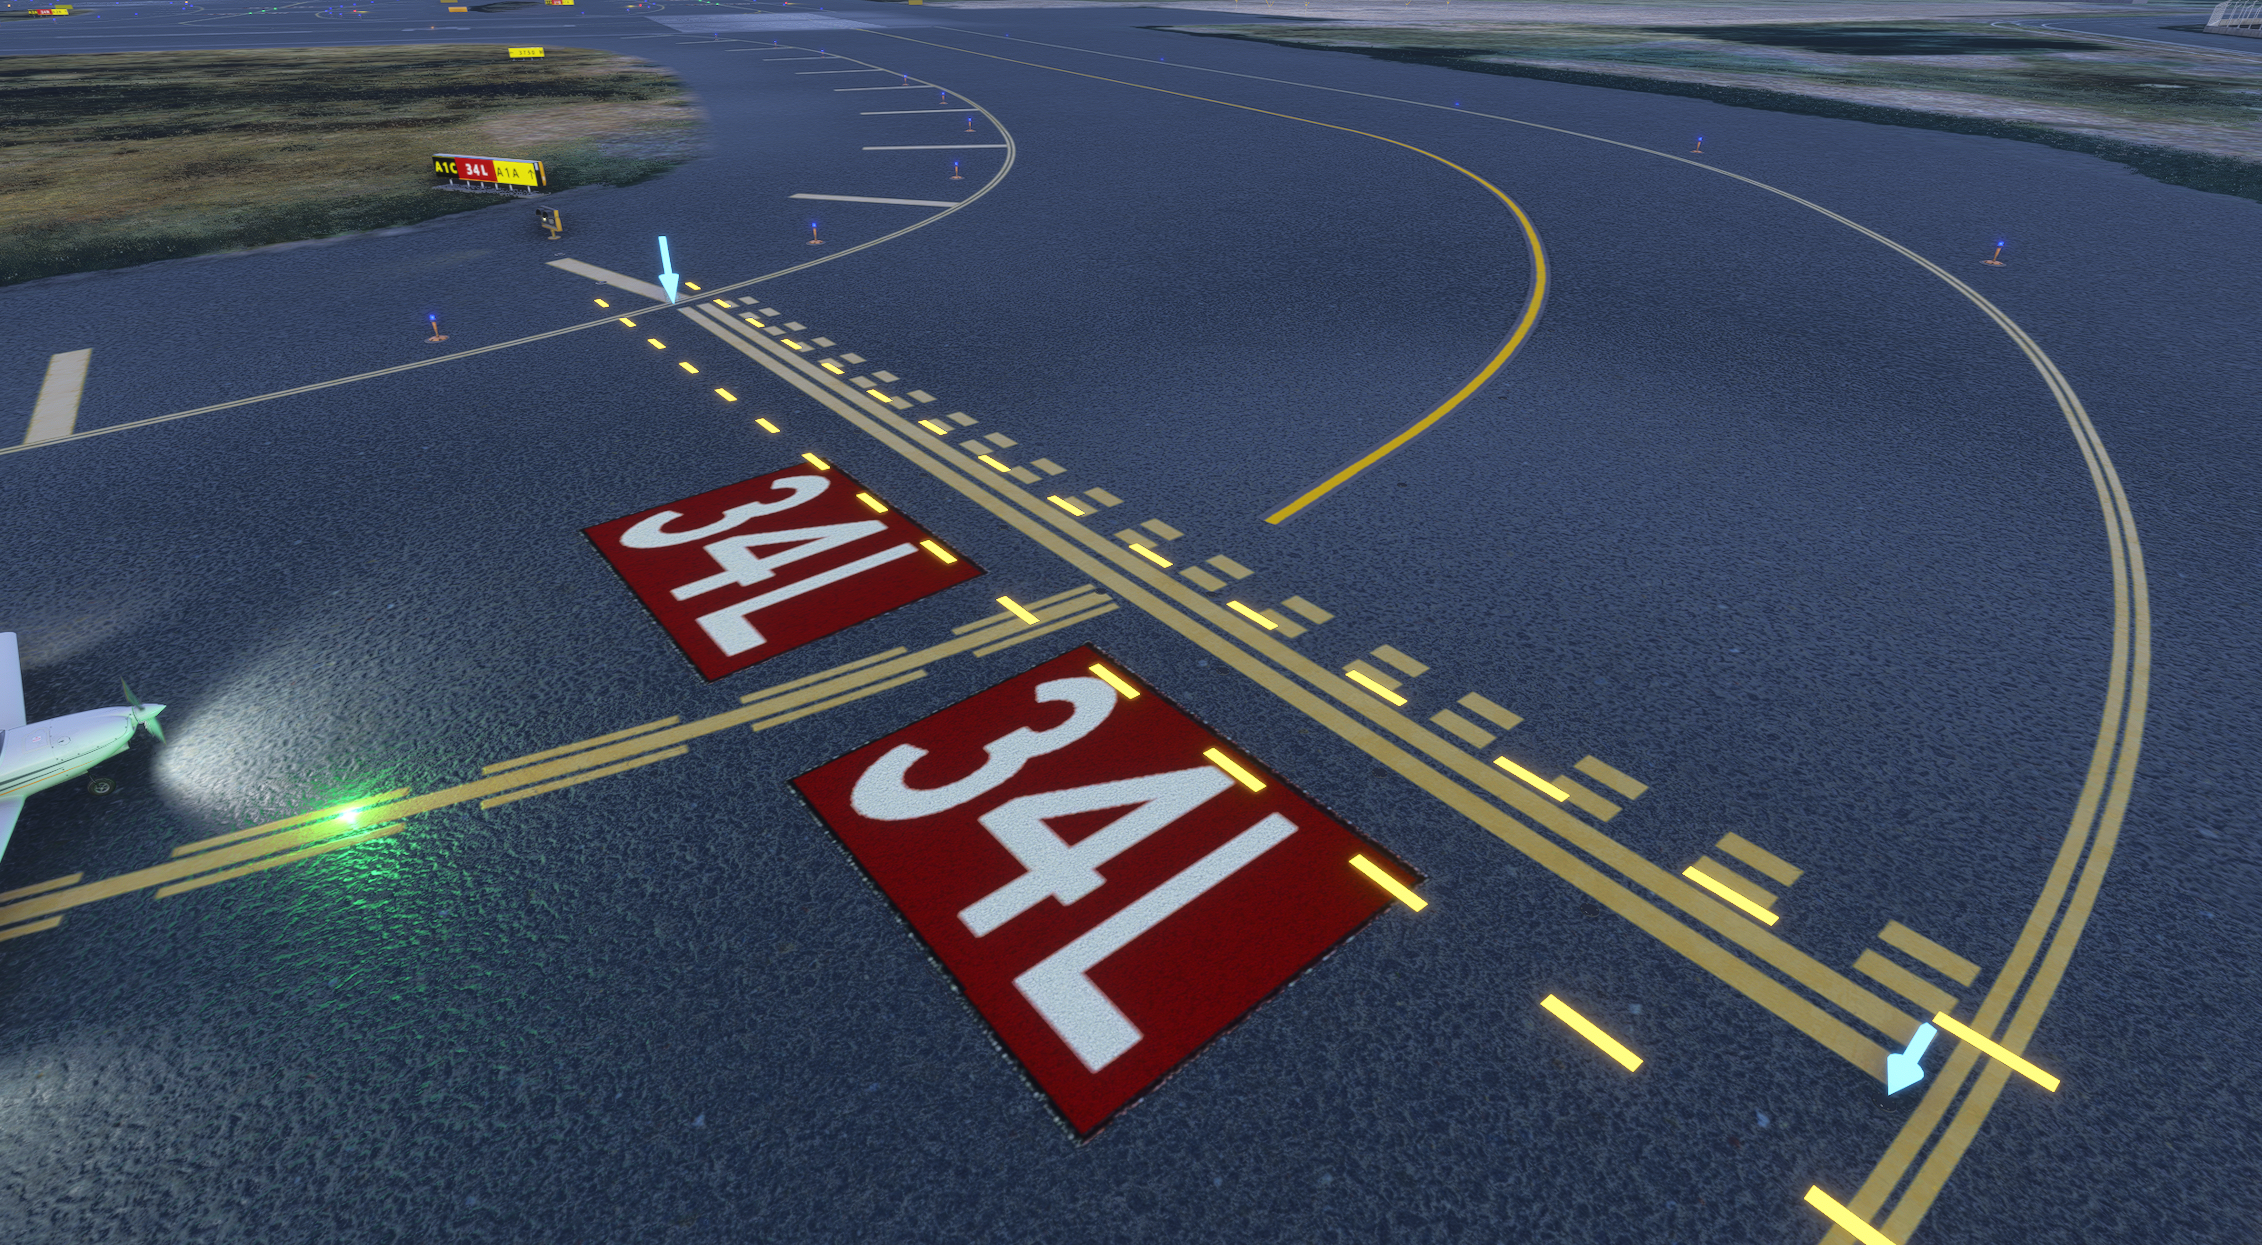
- A small blue arrow marks every node - the points that define a bar’s shape.
- Select a bar. Its selected node grows into a bigger arrow (figure below).
- Walk that node into place with the keyboard while you watch the real markings.
| Action | X-Plane | MSFS (works even while the sim has focus) |
|---|---|---|
| Move the node 0.5 m (Up/Down along the runway, Left/Right along the bar) | ↑ ↓ ← → |
Ctrl+Shift+↑ ↓ ← → |
| Jump to the next node | Tab |
Ctrl+Shift+N |
| Move the IHP center 0.25 m along the bar (Stop bar + IHP and IHP only bars) | Ctrl+Alt+← → |
Ctrl+Alt+← → |
| Turn exclusion zone editing on or off for the selected bar | - | Ctrl+Shift+E |
| Grow the exclusion zone 0.5 m at the edge the arrow points to (while editing the zone) | - | Ctrl+Shift+↑ ↓ ← → |
| Shrink the exclusion zone 0.5 m at that edge (while editing the zone) | - | Ctrl+Alt+Shift+↑ ↓ ← → |
Exclusion zone editing from the sim is MSFS only, so X-Plane has no keys for it. While exclusion zone editing is on, Ctrl+Shift+arrows change the zone instead of the node. Press Ctrl+Shift+E again to move nodes.
If Ctrl+Alt+arrows do nothing, another program may use them (for example Intel graphics). In MSFS, click the XPGuard app window and press them there. In X-Plane, bind keys to XPGuard: contribution - slide the amber (IHP) row left 0.25 m and XPGuard: contribution - slide the amber (IHP) row right 0.25 m.
Each nudge moves the bar live and saves to the editor. So browser and submission stay in sync. Add or remove whole bars in the browser - the sim is for fine-positioning.
Open the Base map from your dashboard
Section titled “Open the Base map from your dashboard”No sim needed. This edits the Base map only.
- Open your dashboard → Contributions.
- Under Find an airport, search by ICAO or name - optionally narrowing by country - and click it. The card shows coverage and full edit history.
- Click
Open in editor →. - Make your corrections and click
Submit.